 DIY
DIY
Quest for a better Zero Turn – Kubota ZD326-60P…
I love operating my zero turn. It’s stupidly fast at mowing grass. I used to dread mowing on an old Compact Utility Tractor (CUT) with a 6 foot rear 3 point hitch finishing mower. I spent half my turning my head backwards going around obstacles and ducking tree branches while crawling along at a measly 6 km/h getting swarmed by deer fly, black fly and mosquitos. Now I’m cutting at 18 km/h with a smile on my face and the bugs are long gone. It’s like driving a go-cart. And I reduced my mowing time by 75%.
I find there are 3 problems with the Zero Turn.
- Dust
- Ride Quality
- Traction
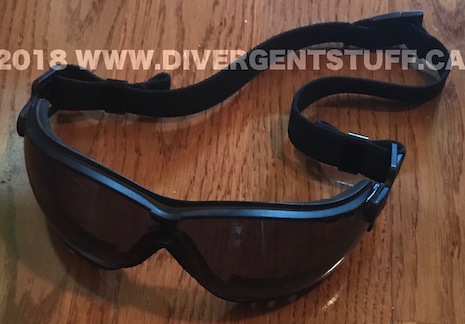
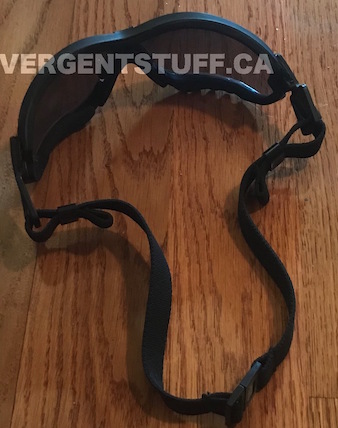
Dust: To get awesome cut speeds zero turns need high lift blades and fast mower blade speeds. Think of a giant shop vac that sucks up the grass and blows the clippings equally hard. My soil is sandy so I get the added benefit of fine dust added to the swarf. Driving without eye protection is a waste of time.
The only thing I can do about dust is buy a pair of good quality industrial dust resistant goggles. I found a nice set at the local safety supplier. Here’s what they look like. I highly recommend them. Problem 1 isn’t necessarily solved but its better than before.
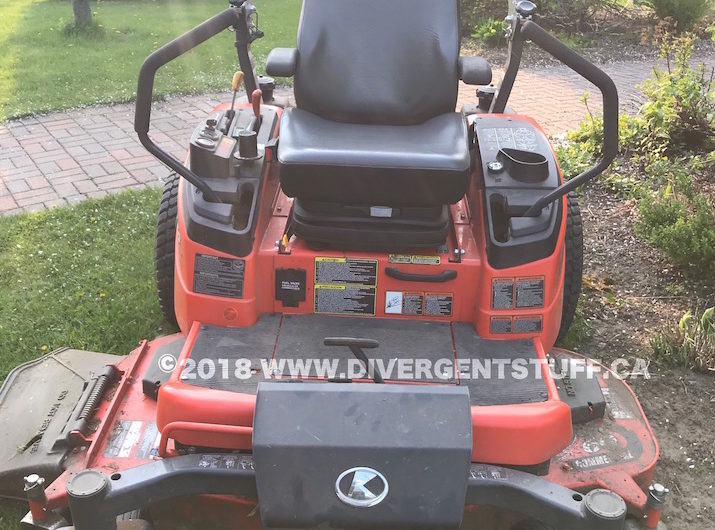
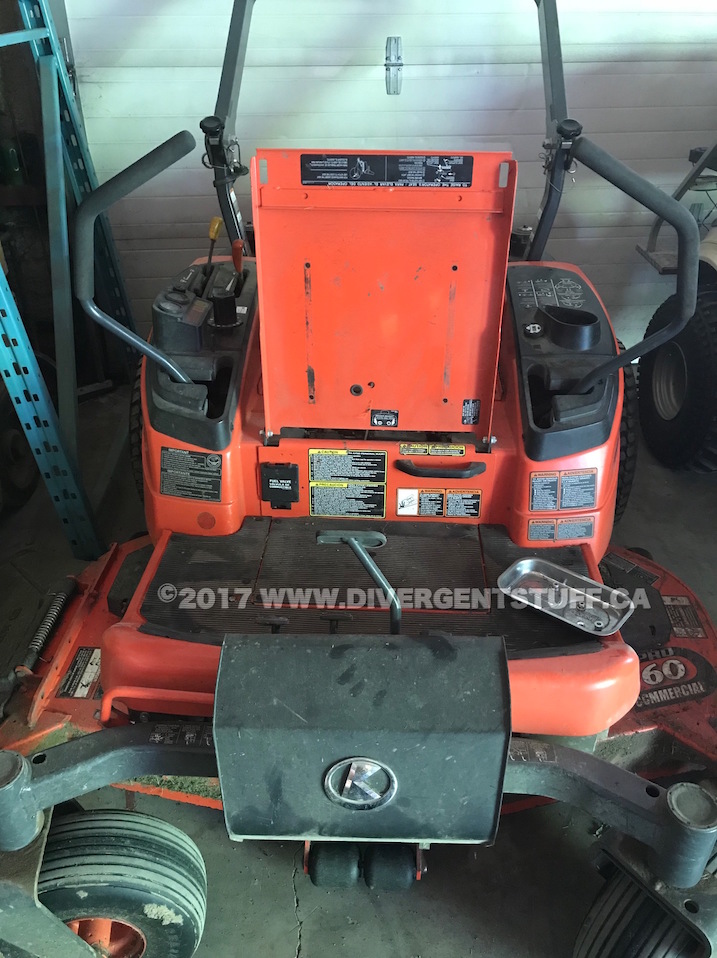
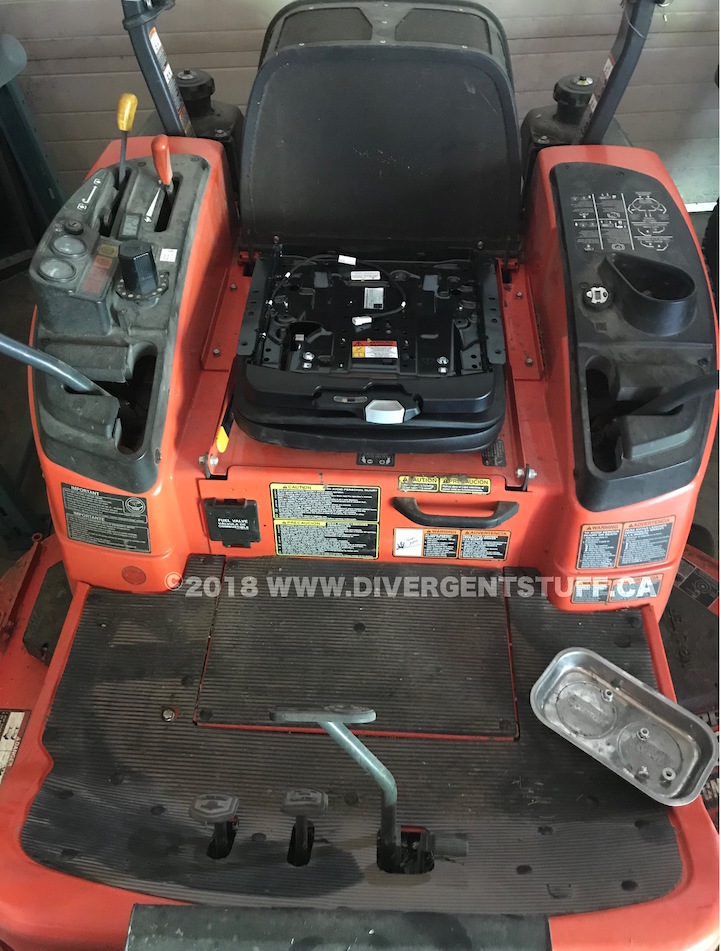
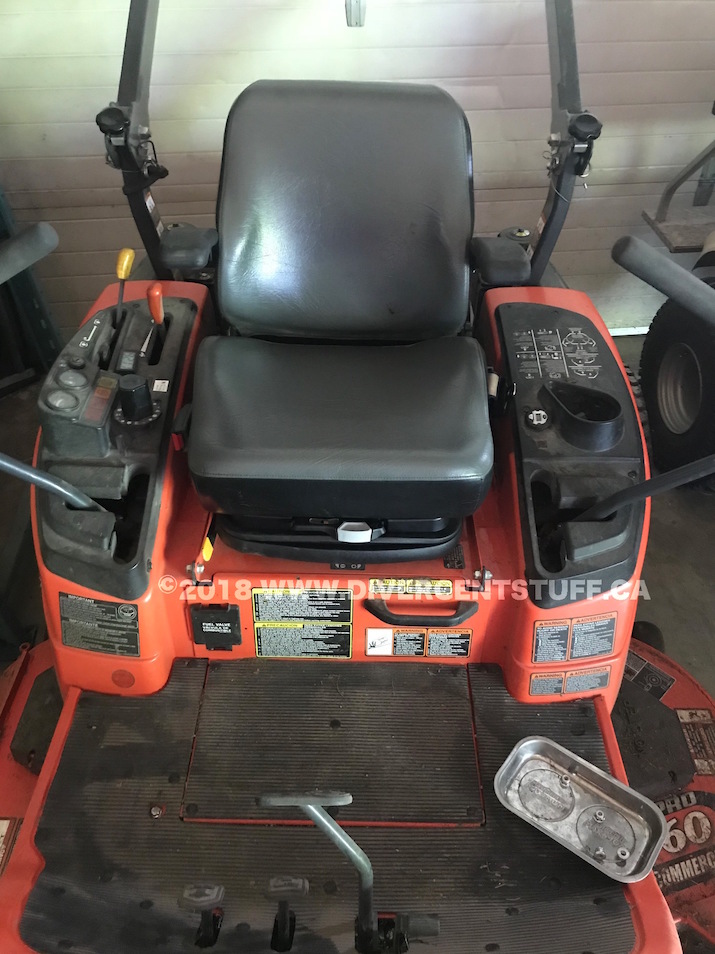
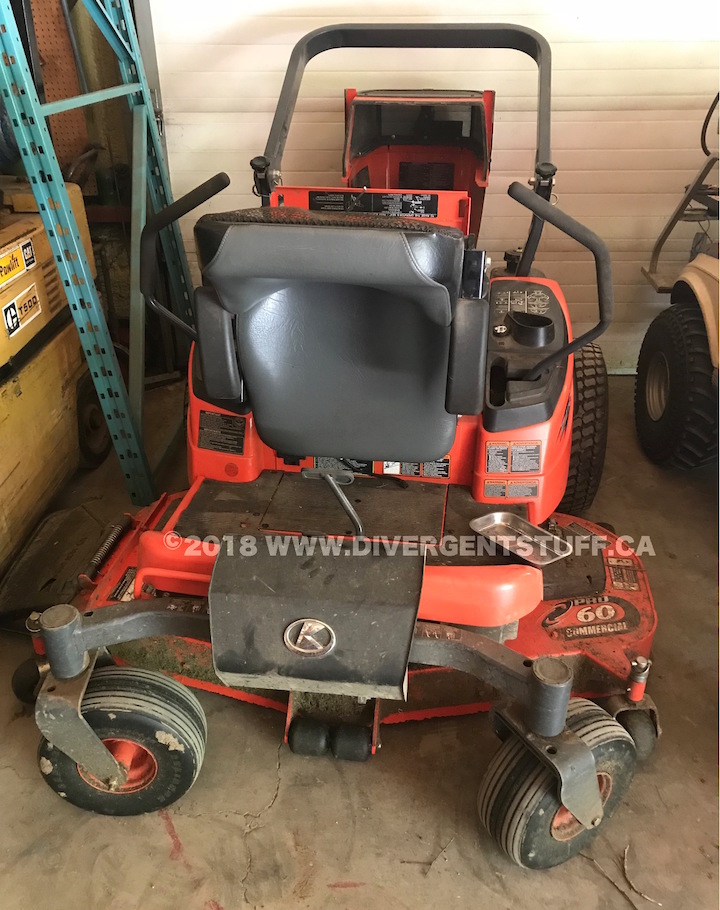
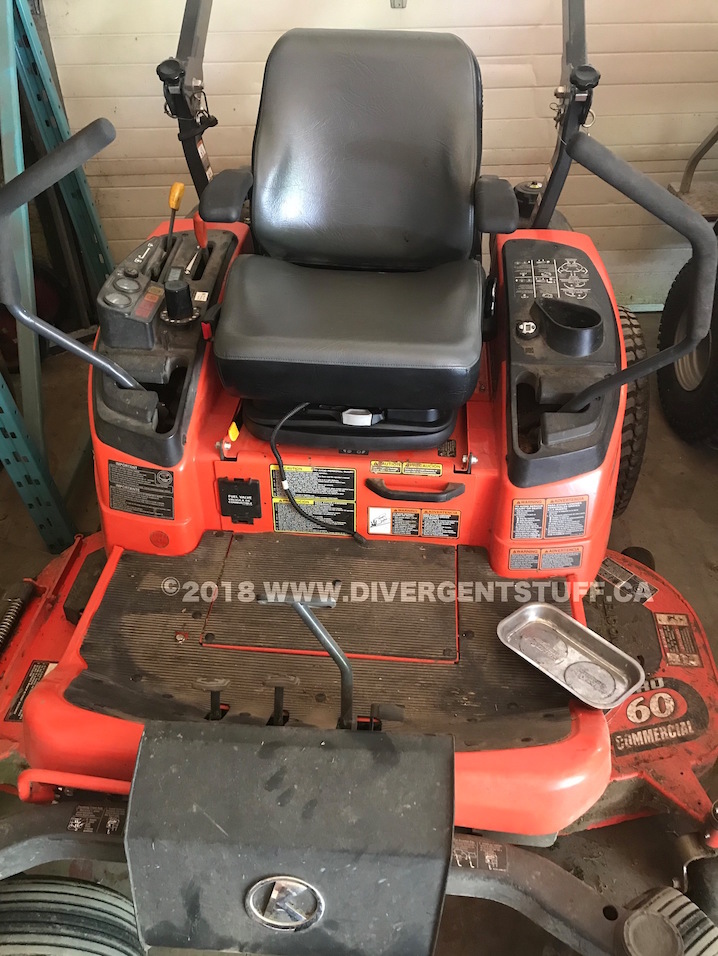
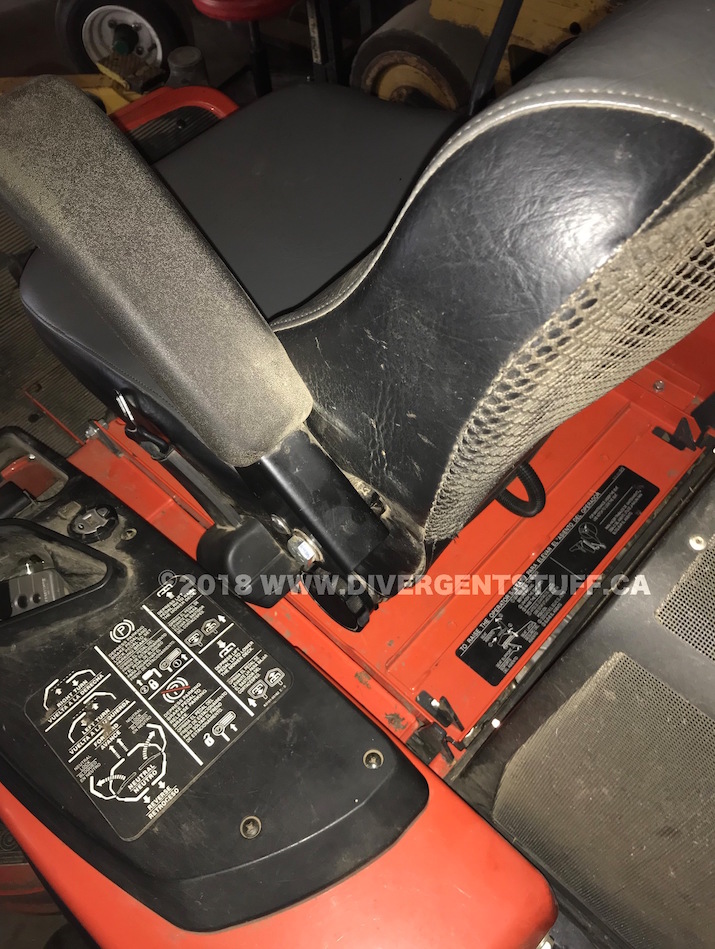
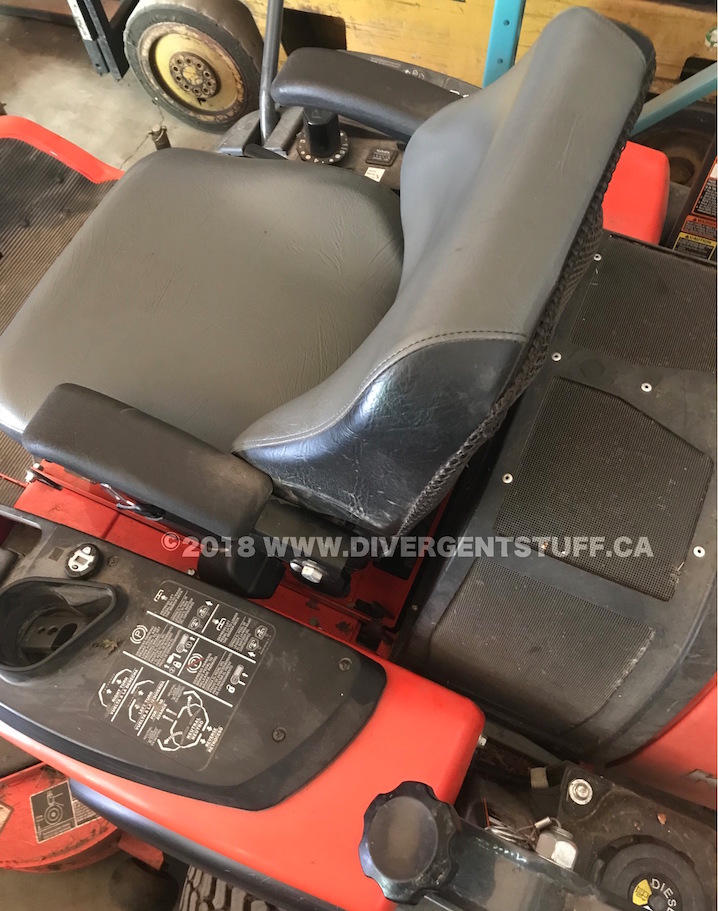
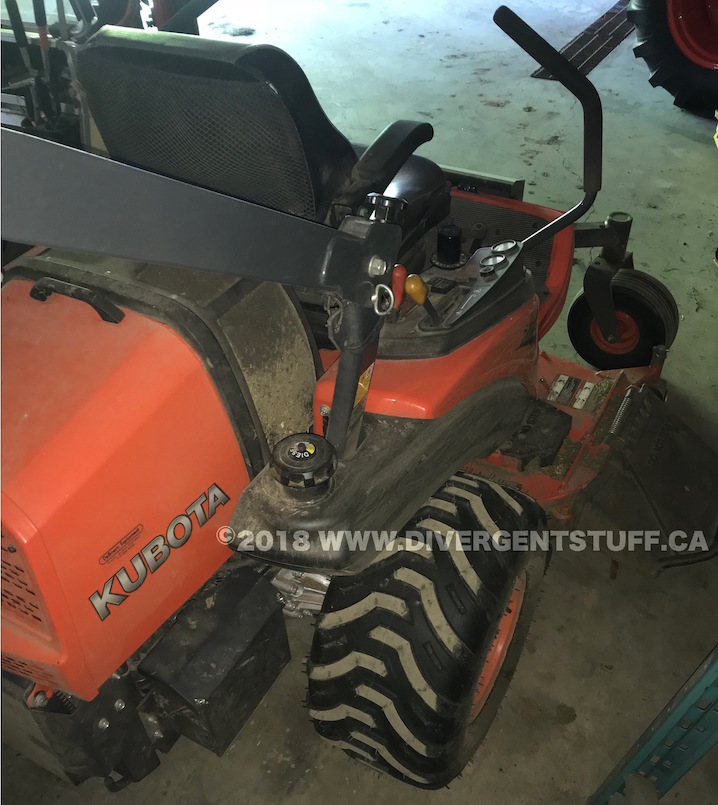
Ride quality: My ZD326 comes with a nice, thick padded bucket seat with arm rests. The problem is that the seat only as 0.75 inches of mechanical seat suspension travel. Riding at speed on rough ground is like riding a pogo stick or bucking broncho. An hour on rough ground is like taking a beating and extremely fatiguing.
Zero turn radius machines have instability issues. I think Kubota engineers are simply trying to keep the machine center of gravity as low as possible. As a result there is ZERO chassis suspension. It gives a nice looking even cut finish but is rotten on the operator’s body on rough terrain. Come late summer the ground is dry and hard and I dread the rough patches of ground.
I think Kubota is finally coming around to operator comfort and I see they are now adding an air suspension seat option. 8 years too late in my books. That and the prices on these machines has more than doubled in 8 years. Sorry Kubota, there is no way I’m spending $25K Canadian on a new dedicated lawn mower.

I started researching air suspension seats. Grammar seats come highly recommended and I’ve tried them on some John Deere tractors. I was quickly discouraged to find very tall seat bases and online prices exceeding $1,200. I contacted two of our local Kubota dealers to see if I could get pricing on the OEM Kubota seat base. The dealer and parts people were clueless and didn’t even know that their zero turns even had an air seat option. Looks like I’m the only one reading Kubota brochures and spec sheets. Their parts people couldn’t even find a part number. Interesting to find out that Kubota advertises an air seat option online and in brochures but don’t show any such components in their online parts.
Then I contacted our local Canadian suspension seat manufacturer/distributer Darby Manufacturing for quote on a low profile suspension seat. After speaking with their sales rep they recommended I use my existing Kubota seat along with the Grammar MSG75 low profile air suspension seat base. They said that the Kubota seat had very good padding in comparison to the stock Grammar seat and I would find that more comfortable for the zero turn. The other benefit was the seat base was only $600 vs $1,200 for the base plus seat.
I ordered the seat on Friday of the May 24 long weekend and it was delivered Tuesday afternoon. Quick!
Wednesday afternoon I was realizing my lawn (aka dandelions) was growing gangbusters and I would need to cut again soon. After dinner I went in the barn to see what needed doing.
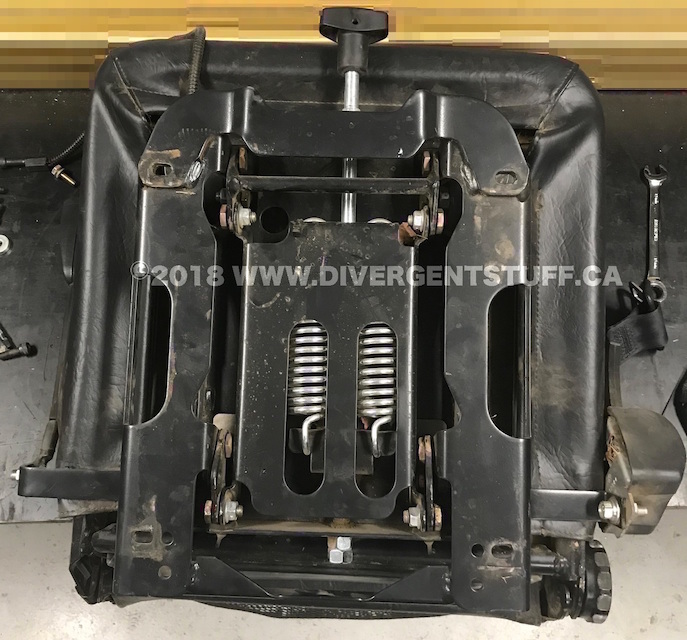
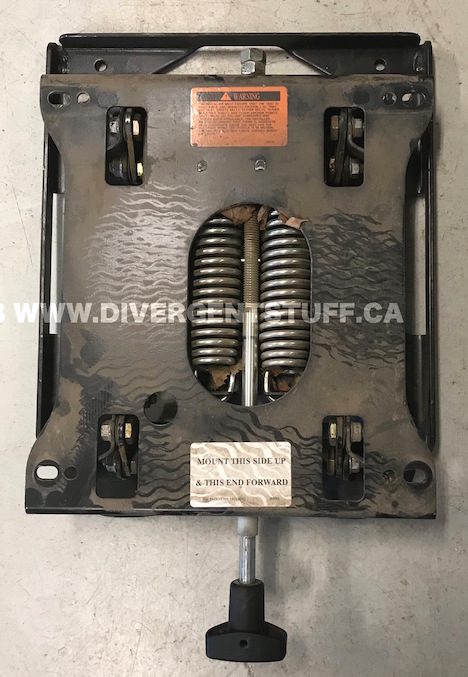
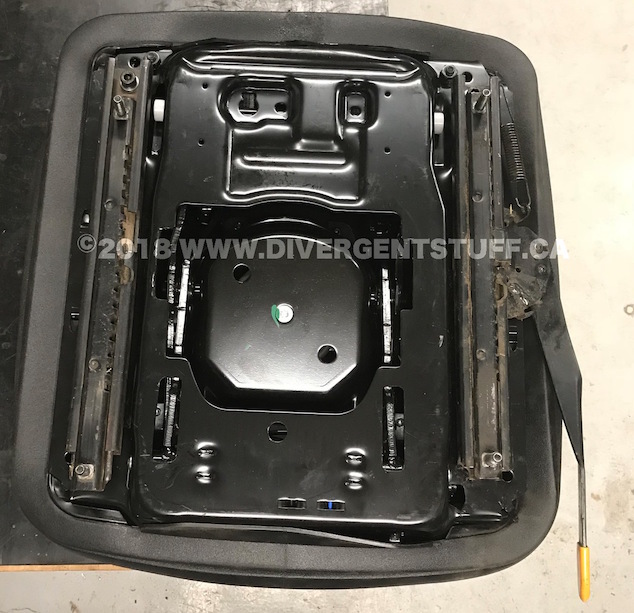
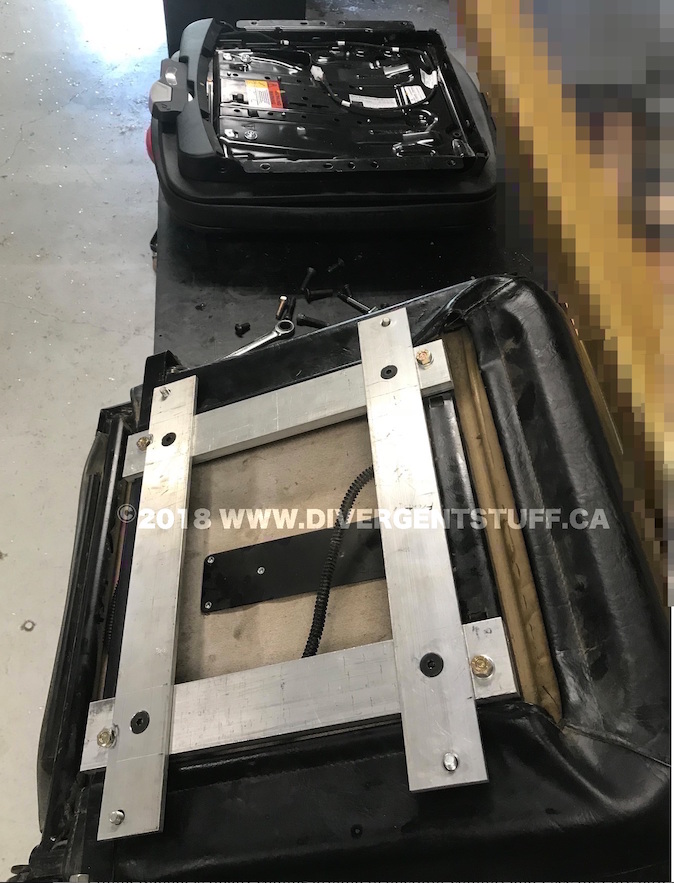
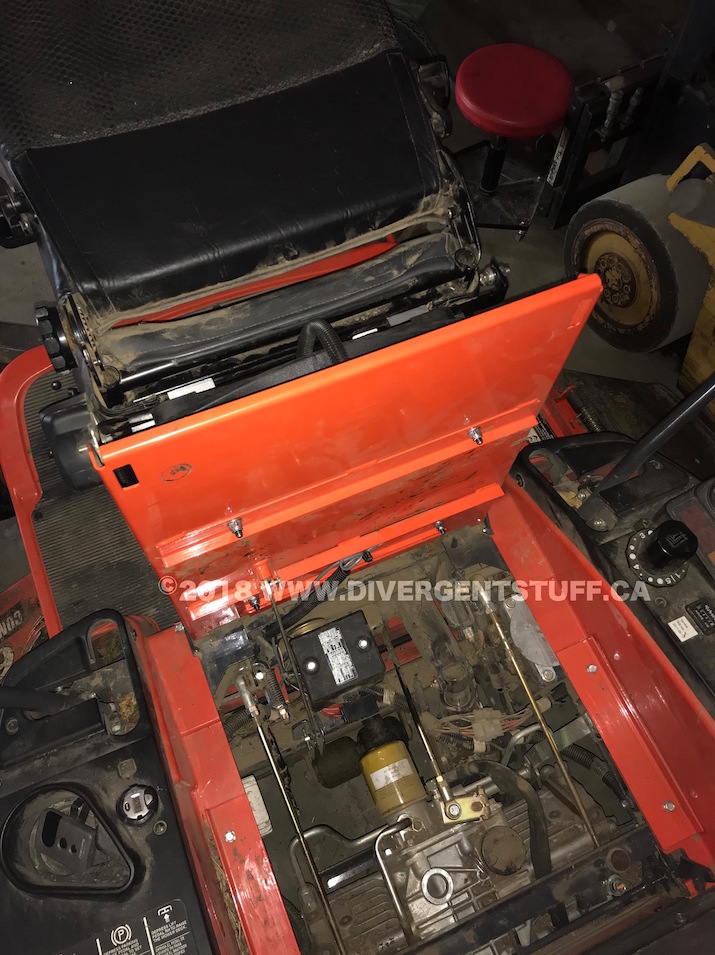
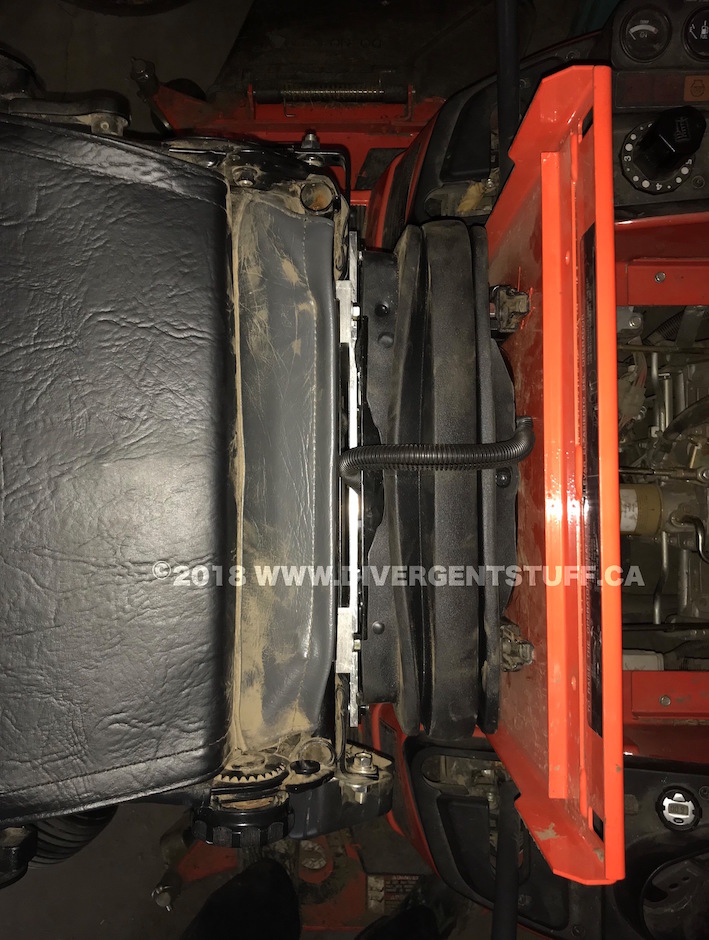
Four locknuts and one wire harness connector was all it took to remove the ZD326 seat and base. The OEM base is 3.25″ tall and provides 0.75″ of travel. The MSG75 low profile base has a mx height of 5″ and provides 1.5″ of travel. FYI the standard Grammar base has something like 4″ of seat travel but that would put me up way to high.
I did some quick measurements and was pleased to discover that the OEM Kubota base sliders could bolt right into the Grammar universal mount base and required no drilling. The Kubota seat was a different story.
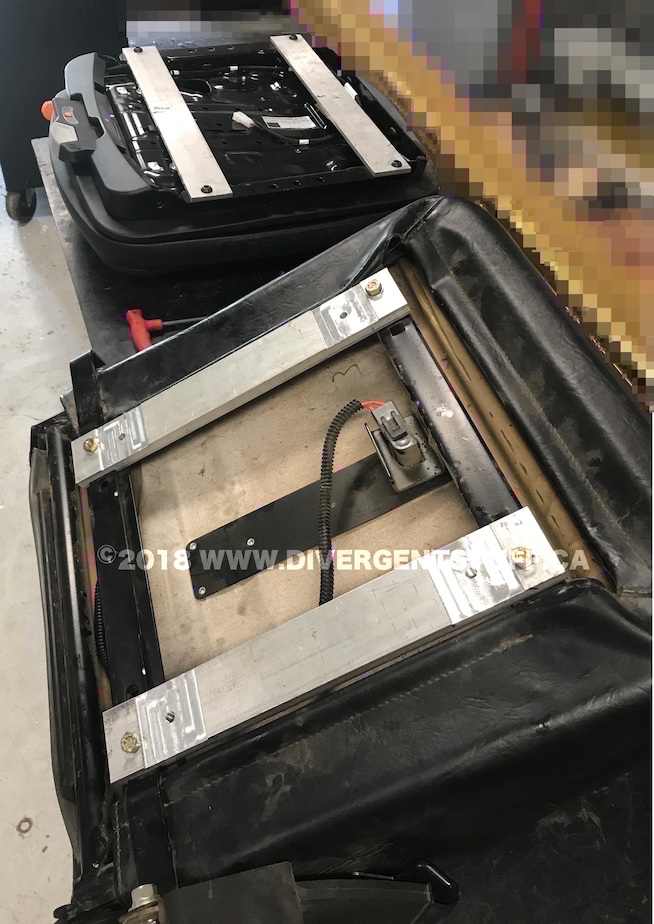
The Grammar seat mount is approximately 16 inches wide by 9 inches long. The Kubota seat bolt pattern is 11.25 x 11.25 inches square. To compound problems the Grammar seat base is totally enclosed and the seat had to be bolted DOWN TO the base. The Kubota seat had to be bolted UP TO the seat. The OEM Kubota seat base was relatively open allowing for tools to reach the bolts. The Grammar seat base was the same width and length of the Kubota seat, the mount flanges faced inside and were completely inaccessible from outside the base. To round things off the Grammar seat base electrical come out the top rear of the base whereas the Kubota seat electrical comes out the bottom front. Grammar DOES NOT give users any option of routing the electrical through the base and down.
These are two big minuses in my books.
So now I have to build an adapter plate that not only allows me to fasten bolts facing both directions, but I have to elevate the seat even further to allow me to fit tools in between to tighten the bolts. The Kubota seat fasteners are recessed deep in the seat. More evident efforts by Kubota engineers to lower C of G.
My solution was to make a cross brace. To keep it as low as possible yet add enough height to fit in tools I used 2″x1/2″ flat bar for the seat and 2″x1/4″ flat bar for the Grammar base. I used Aluminum flat-bar because I have it in stock and I don’t have to paint it
The Kubota seat belts are attached to the seat using 1″x0.180″ steel flat bar. Driving the zero turn without seat belts is a no go as I’d be out of my seat in the blink of an eye on rough terrain, especially on slopes. I had to dado a slot for the seat belt bracket in the aluminum brace.
On the opposite side of the seat brace I dado’d a 0.050 slot to lock in the cross brace to the Grammer base. I uses socket head counter sink M8 screws with lock-tite to lock the braces together.
An interesting note – Kubota’s are all metric. Except for the seat base bolts. All the other bolts are M8. The Kubota seat base bolts were 5/16-18 into the seat and M8 into the suspension and mower chassis! Weird, I haven’t seen stuff like that since the 80’s.
Marrying the Kubota seat with Grammar base was an exercise in frustration resulting in lots of choice words and small sheet metal cuts on my hands. Thankfully I did this on a work bench where I could sit on a stool and work at eye height. This job would be impossible to do in-situ on the machine. Even with 5/8″ clearance between the Kubota seat and Grammar base it was impossible to put the box end of a wrench over the bolts for tightening and the seat belt mount left me at best a 1/8th turn of the wrench. The only way I could get in to work was to loosen both upward and downward facing bolts so I could squeeze a finger in to start the threads. I could not squeeze two of my chubby fingers in anywhere. I would have called my wife to start the bolts onto the threads but I was already in the dog house for spending $600 on an air seat base for my lawnmower 😉
I felt proud finally accomplishing the impossible. Everything bolted up and secure!
The only problem now was I realized I forgot to pull the air pump wires and seat operator kill switch wires out. Cranky! Luckily a little wire fish line let me hook on and pull the wires out. The seat pump wires had to go out the back and the seat switch wires the front.
Putting the finished assembly back on the ZD326 was a walk in the park. I had to cut and splice the seat sensor switch to make it longer and feed it though the mower bung hole. I also had to run power to the seat pump. I ended up using some 18 gauge shielded 2 conductor wire for both because I had it handy. I figured the casing would give me some abrasion resistance especially floating around under the seat.
Lucky for me I discovered that Kubota put a 15A aux fuse circuit for a cigarette lighter (what? where is that on my machine). I also discovered it’s pre-wired with a 20A circuit for lights. Sweet. I tied into the Aux. power circuit with an inline splice and then swapped the 15A fuse with a 10A to match the pump compressor draw. Turned on the tractor and the air seat worked as expected. Sweet!
All in time was 4 hours.
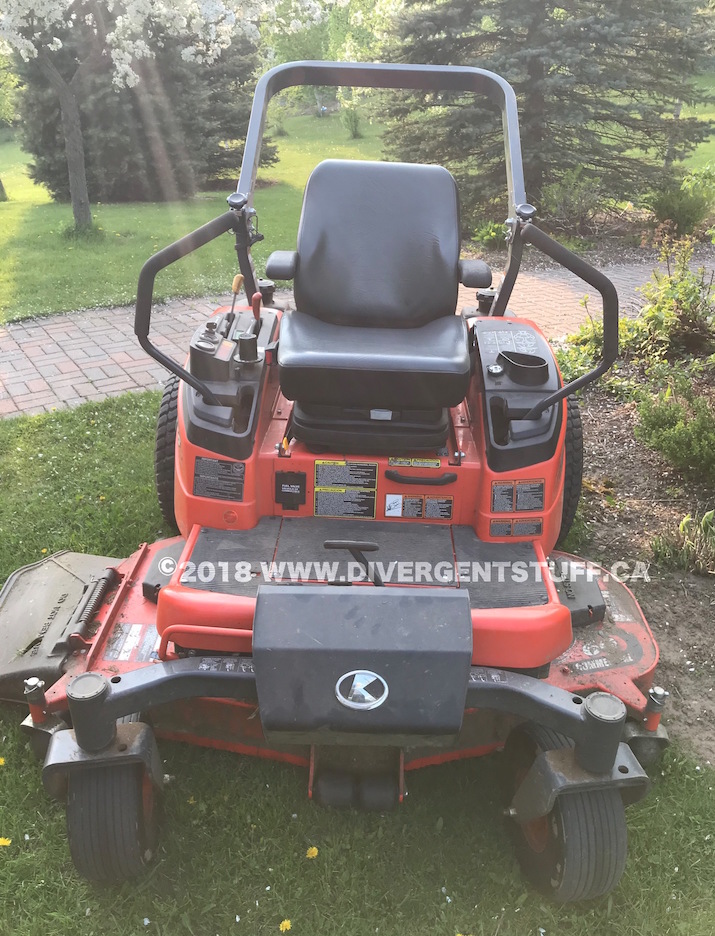
Next evening was time to try out the new setup cutting grass. I’m now sitting close to 3 inches taller on the zero turn with the air seat in full up mode. It felt a little odd at first. I feel like I’m sitting ON the machine now where I was more IN the machine before. The air seat performed as expected on the rough terrain. I wish I had the four inches of travel available on the full size seat bases but it’s already twice as good as the OEM seat travel.
Now that I think about it the OEM seat was more like riding a jack hammer and the new air seat is like riding a pogo stick. It could be better for sure. Regular lawn mowing is now buttery smooth. Rough ground is less jarring on my spine and I don’t feel like a bobble head. I can definitely cut fast on the rough and smooth ground.
One added benefit of the higher ride hight is that the controls are in a better position for the arm rests. I’m 6’1″ 200 lbs and I can finally have my arms at a more natural position. Forward and reverse controls are more ergonomic for me now.
Bottom line – was it worth it? I’m still struggling with spending $600 on an air seat suspension. It’s an improvement but it’s not life changing. I want to use it a few more times and will provide a long term update then.
| PROS | CONS |
|---|---|
| Smoother ride | Expensive. |
| Less jarring on neck and spine | Adapting OEM Kubota seat was not easy - Grammer seat should have seat bolt flanges facing out to make installation easier or seat base should be narrower. |
| Installation wasn't too difficult, only time consuming and fiddly | No way to route wiring through the Grammer seat base, has to be routed outside. |
| Higher operator position improved control lever ergonomics for me | I had to raise my operator height more than planned. |
| I can operate the machine faster on rougher ground | Not enough suspension travel for added height. |
| Looks cool. Did I tell you I have an air seat on my zero turn? | Perceived incremental benefit using air suspension. |
| Easy to change ride height and suspension firmness/softness while operating machine. |
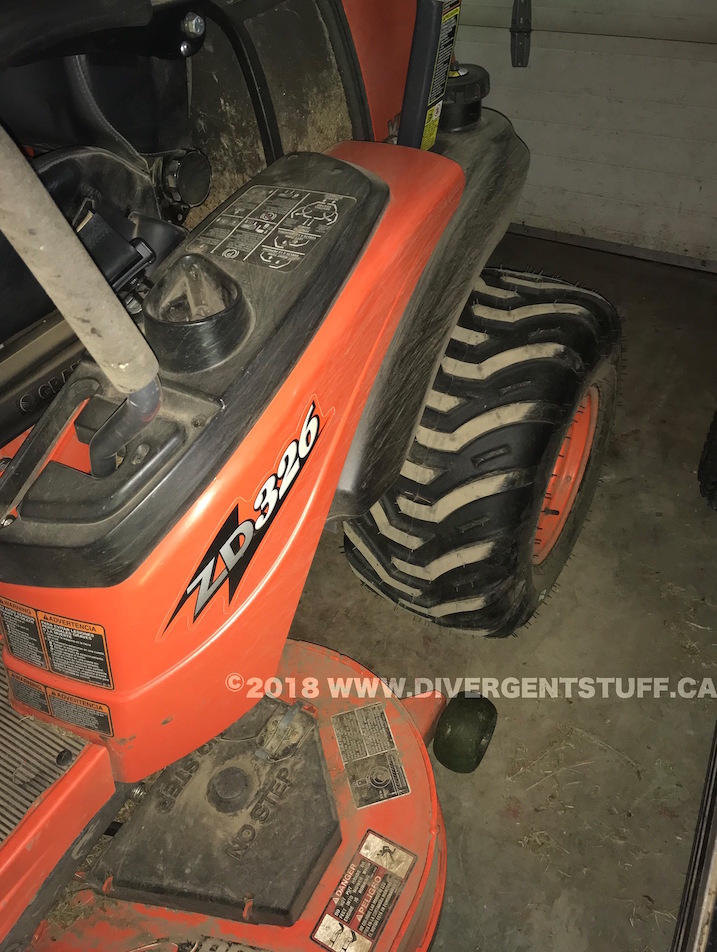
Traction: Most mowers come with R-3 Turf Tires. In my experience Turf Tires are no better than racing slicks on wet grass and sloping ground. Zero turns will quickly and easily shred your lawn on turns, especially around trees and on slopes.
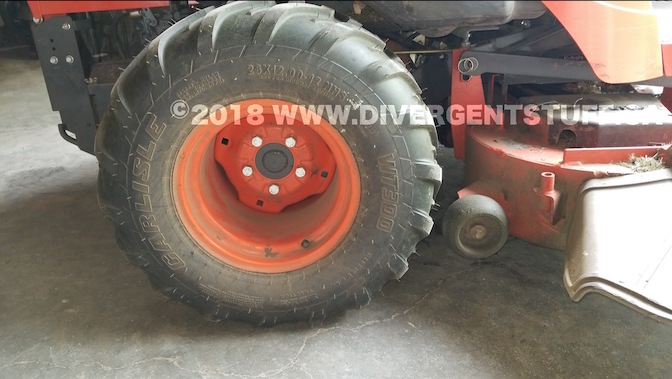
After a lot of researching I found several good posts and testimonials on tractorbynet.com guys using tractor style bar tires on their zero turns. The one that caught my interest was the Carlisle WT300, a 4 ply tire Carlisle calls “Turf-friendly tread design for tractors with less than 30HP”. The rounded corners on the edges seems to me to be less aggressive than the standard R4 or bar tires and I found them for a reasonable price. My ZD326 has 26×12.00-12 turfs and the WT300 were available in that size. Online I found them for USD$80/ea + shipping of $85 each. Calling around prices ranged from My local AG tire guy at $140/ea to other guys on Kijiji selling the same tire for $195.

I got a pair and took them to my local autoshop to get them swapped. My experience on doing ATV tires was breaking the bead can be a SOB even when using the tractor bucket and wasn’t worth fighting with to save $20. The shop got the old tires off but didn’t know what to do with the new ones. The new bead was at least 4″ narrower than the ones that just came off. I ended up taking them home and wrapped a 4″ ratcheting tie strap a couple times down the center of the tread. I applied a liberal amount of dish soap (Palmolive to keep my hands soft) around the bead and rim. Ratcheting the tie strap down caused the bead to expand out enough to catch the rim and I was able to put in a couple PSI of air to hold the bead. I removed the strap and pumped up the tires until the beads seated. Simple enough!
Now the acid test. Cut some grass.
UNBELIEVABLE! It’s a completely different machine. I can’t believe the difference in control I now have.
I am now thoroughly convinced stock turf tires are nothing but useless and give me about the same traction as a pair of slicks on snow and ice. The ZD326 has oodles of instant wheel torque with the hydrostatic drive. Trying to quickly change spedd or direction always resulted in skids and slides. While that may be fun at times it’s pretty hairy driving around my pond. The land is sloped towards the pond on all sides and with the turfs I’m constantly sliding towards the water, especially on the corner turns.
I can go from full speed to a fast, controlled stop WITHOUT tire slide. On grass. On gravel. On polished cement. I can change speeds and make turns on steep slopes, even going up and down hill. Trying to turn on a hill with turf tires only results in tire slide and grass tear up trying to slow down. I now feel like I have 100% control over the machine and I can move it the where I want when I simply think about it versus relying on power slides and fancy work on the controls to compensate for poor traction.
I give these tires 11/10 on improved traction, handling, fine control, and reduced lawn tear up.
Between the air ride seat and the bar tires it’s like a brand new machine. Superb control. Smoother ride. I love my zero turn again.
I highly recommend these tires. Without question if I ever bought a new new zero turn again I would have the dealer toss out the brand new stock turf tires and install the Wt300’s. In fact, I would never put turf tires on any vehicle ever again.
Next Steps?
Now I got to tweak the rear tire pressures to give me good traction and smooth ride. I started at the ZD manual recommended 17 psi for the WT300. Using the turf tires I find I have to run at about 12 psi if I want to stay in my seat.
I guess if I truly want to perfect this machine I need to add a second fuel gauge. Again – come on Kubota, you charge an arm and a leg for these machines, why don’t you simply add the second gauge to see fuel levels on the second tank? The indicator light is fine for the one tank is OK but would make a lot more sense to have two gauges and use the indicator light to notify the operator that the tank is at reserve level.
7 COMMENTS
Did you consider the Carlisle Versa Turf at any point for your ZD
The new Vesra Turfs were not available in my tire size at the time. The old versa turfs look too much like the OEM turfs I removed. The new design looks closer to an R14 which would probably work better. IMHO Turfs are not much better than slicks for traction on hills and on wet grass. The ZD is a heavy machine and the turfs simply lose traction and control in a heart beat.
To divergent1 did you filled your wt300s with fluid ? We’re getting a set for the ZD331 kubota
No, my machine is heavy enough and traction isn’t an issue.
I have a zd331 with side slide problems are the Wt300’s the way to go? We’ve tried hdfield trax, Kenda Terra trac, no good
I’ve had good luck so far on the WT300’s and I’m using them for a third year now. Side slide on hills is better, turning and climbing hills is far superior than with the OEM turf tires. Wet grass is less an issue and I can power through the soft goo around ponds that I would have got stuck using the turf tires. You really have to finesse the controls as you will definitely get more turf tear up on turns.
Hey there! I’ve been following your site for some time now and finally got the courage to go ahead and give you a shout out from New Caney Tx! Just wanted to mention keep up the fantastic job!